How to install AMX Mod X
How to Install AMX Mod X for Your HLDS Server
Welcome to this detailed guide on installing AMX Mod X for a GoldSRC Half-Life server (including mods such as Valve, Team Fortress Classic, Counter-Strike, Day of Defeat, and Natural Selection). For those unfamiliar, AMX Mod X is a powerful and versatile Half-Life Metamod plugin designed primarily for server administration. It offers extensive scripting capabilities, enabling the creation of "plugins" to extend and customise the functionality of your server.
For this tutorial, we will use the current stable version, AMX Mod X v1.8.2. Other versions are also available, which I will outline below. This guide assumes that Metamod is already installed, as it is a prerequisite for AMX Mod X. If you have not yet installed Metamod, please click here for instructions. For demonstration purposes, I will install AMX Mod X on a fresh installation of HLDS with Metamod on Windows. However, the process is very similar for Linux, and I will highlight any differences as necessary. For this guide, AMX Mod X will be installed in the valve folder. If you are using a different mod, such as Counter-Strike, install it in the cstrike folder, or tfc for Team Fortress Classic, dod for Day of Defeat, ns for Natural Selection, and gearbox for Opposing Force. Additional files may be required for certain mods, which I will mention where relevant.
- AMX Mod X v1.8.2: The current stable build of AMX Mod X.
- AMX Mod X v1.9: An experimental build of AMX Mod X, still under development and potentially unstable.
- AMX Mod X v1.10: The master build of AMX Mod X, featuring the latest updates. This version is still in development and may also be unstable. Personally, I prefer this version for its added functionality.
Note: Once you become familiar with AMX Mod X and begin adding custom plugins, you may need to upgrade to version 1.10, as it offers greater functionality. Typically, the plugin documentation will specify which version of AMX Mod X is required. For most plugins, however, version 1.8.2 will suffice.
Let us begin by downloading AMX Mod X from the official website. Download the AMX Mod X Base files. If you are installing this for a mod other than Half-Life (e.g., Counter-Strike), you will also need the additional Mod Addon Pack.
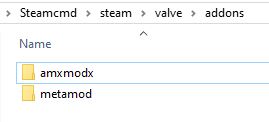
Extract the contents of the downloaded zip file into your mod folder (e.g., valve). This will create the required amxmodx folder inside your addons directory.

Next, navigate to your Metamod folder and locate the plugins.ini file. If this file does not exist, create it by opening a new Notepad file, saving it as plugins.ini, and placing it inside the Metamod folder. Alternatively, you can download a prepared version of the file for both Windows and Linux from here.
Open the plugins.ini file and add the following lines:
For Windows:
win32 addons/amxmodx/dlls/amxmodx_mm.dll
For Linux:
linux addons/amxmodx/dlls/amxmodx_mm_i386.so
Important: Linux file systems are case-sensitive, so ensure all file and folder names are in lowercase as shown in the examples.
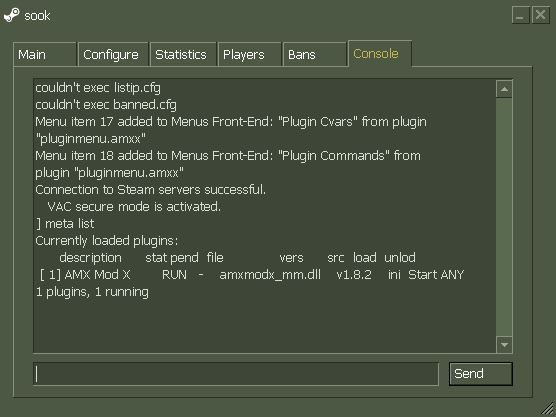
Save and close the plugins.ini file. Launch your server or game to verify the installation. To check whether AMX Mod X has been successfully loaded, open the in-game console and type:
meta list
The console output should indicate whether AMX Mod X is running, as shown in the example below:

If everything is working correctly, congratulations—you have successfully installed AMX Mod X! If you encounter any issues, please join our Discord community, and I will be more than happy to assist you.


